If you are worried about your files in server that trial period is over and also you can still want to continue to use your Azure service. Solution is simple: Migration.
In this example, I'll continue with Wordpress website.
Before we start you should download MySQL Workbench from here and Filezilla from here and I used Notepad++ and you can download here.
Firstly, you should log in your old trial account before trial period is over. If your trial period is just over, don't worry you can still rescue your data. In this condition, you should send a ticket to Microsoft Help Service. They will help you, but usually you need to make a phone call with a technician. Keep in mind that, if you are not able to speak somebody.
 After that, we are going to look for our ftp address, username and password. You can see your ftp address and username on the right side. If you didn't create it, you should set it. (If you are still in trouble you should check here: http://www.windowsazure.com/en-us/manage/services/web-sites/how-to-manage-websites/)
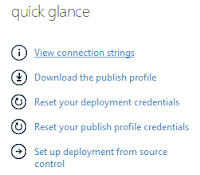
In here, we will note that our database strings and ftp server address. We need "View connection strings", "FTP HOST NAME" and "FTP USER" values. Your password is a password that you settled before.
After that, you should export your database from old webserver.
First, you'll want to follow the directions here to setup the connection to your MySQL database:
https://www.beastnode.com/portal/knowledgebase/38/How-to-Use-MySQL-Workbench-to-Edit-Your-Database.html
Once you have done so, we can start:
EXPORTING A DATABASE (Database backup)
1. Start up MySQL Workbench and make sure you're at the home page. Click the small "home" icon at the top left if you're not there.
2. Under SERVER ADMINISTRATION, select "New Server Instance"
3. Check the "Take Parameters from Existing Database connection" box and select the account you created in the write up above.
4. Click Next until you reach the remote management selection page and make sure that "Do not use remote management" is selected. Hit next again and type in your preferred server instance name. Click on Finish.
5. Double click the newly added server instance under Server Administration and login using your MySQL database credentials.
6. In the "Task and Object Browser" bar on the left, select "Data Export and Restore" which will load it into the right window.
7. Select the "Schema" with your database name in it (usually your username).
8. Under "Options," select "Export to Self-Contained File" and choose a directory to download it to. In the directory selection menu, make sure to type in the name of the file and append it with .sql
9. Click on "Start Export" at the bottom and you should be set.
Then you will edit your database (sql file). I recommend Notepad++ for this. You will change your old database name with new one that you can find it from your new server. Then import that database to it. Thats it, migration is over.
